Mastering the art of smoking a brisket is a rite of passage for any barbecue enthusiast. I’m often asked, “How long to smoke a brisket?” and my answer is that it’s not just about time—it’s about technique, temperature, and patience. Navigating the smoking a brisket timeline can be challenging, but I’m here to provide you with the smoking tips for brisket to ensure your next slow-cooked endeavor yields that perfect brisket smoking time.
For a whole, 12-14 pound brisket, anticipate a journey of 13-17 hours immersed in smoke and heat, transforming a robust cut into a succulent masterpiece. How you manage your smoker, the quality of your trim, and the exact nature of your brisket all influence the smoking duration. Stick around as I guide you through each pivotal step, infusing decades of pitmaster secrets into your very own backyard barbecue.
Key Takeaways
- Brisket smoking time is typically between 13-17 hours for a full-sized cut.
- Preparation includes trimming the brisket, using the right wood, and seasoning effectively.
- A consistent temperature and smoke level are essential for the perfect smoke.
- Understanding the brisket stall and how to manage it is a key skill in smoking successful briskets.
- Incorporating a rest period after smoking ensures juices redistribute for optimal tenderness and flavor.
Understanding Brisket and Smoking Basics
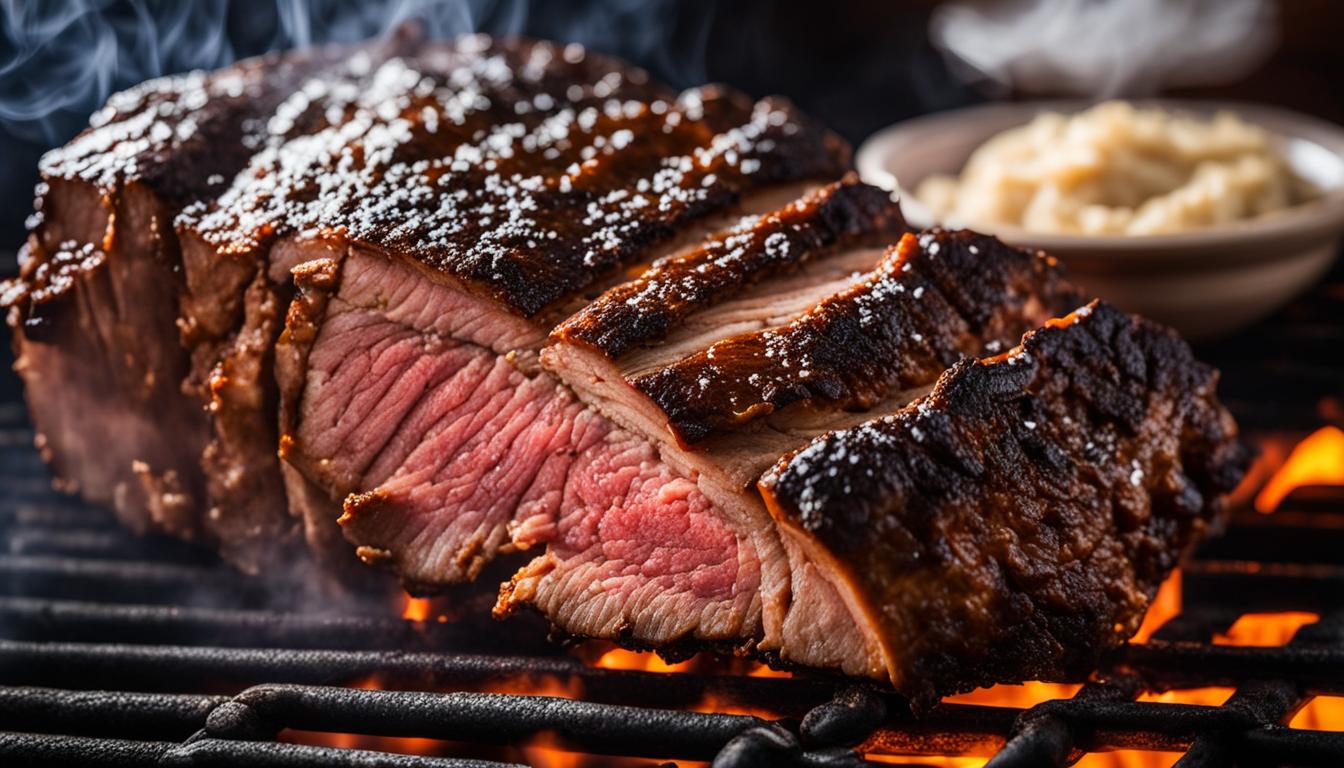
When I embark on the quest to slow-cook a brisket to perfection, I know I’m in for a journey of precision and patience. Let’s break down the factors affecting smoking time that you, too, must consider for that ideal outcome. First, we need to determine the estimated time for smoking a brisket. It’s often suggested that smoking time can fall between one to two hours per pound; thus, a sizeable 10-pound brisket may require a commitment of 10 to 20 hours immersed in aromatic smoke.
To truly understand the intricacies of brisket smoking, awareness of the variables that sway smoking time is critical. The presence of connective tissue and collagen necessitates a low-and-slow cooking method, and the prime internal temperature to aim for at the end of this marathon is around the 200℉ benchmark.Patience is the brisket smoker’s secret weapon. The layers of flavor that develop in the process cannot be rushed if you seek to achieve that tender, fall-apart texture complemented by a robust smoke ring.
It’s essential to select a smoker that delivers consistency and control. Whether you use a traditional offset smoker or a modern pellet grill, finding the right temperature balance is key. Various types of smokers might alter the process, but the end goal remains the same—a juicy, mouth-watering brisket.
Bearing in mind the considerable influence these variables have on smoking time, a straightforward table may help clear the fog on how each aspect comes into play:
| Factor | Impact on Smoking Time | Considerations |
|---|---|---|
| Smoker type | May cause variation in temperature control | Different smokers offer diverse levels of consistency |
| Cooking temperature | Affects duration and depth of smoke flavor | Ranges typically between 225°F to 300°F |
| Brisket characteristics | Size and composition influence cooking time | Marbling and thickness play roles in duration |
| Desired internal temperature | Dictates the point of doneness | Ideal finished temperature approximates 200℉ |
Dedication to monitoring and adjusting throughout the cooking process will greatly impact your smoking success. Achieving that perfect brisket requires harmonizing all factors, understanding your smoker, and embracing the journey of slow cooking a brisket.
- Prepare for variability in your brisket’s smoking time.
- Know your smoker well to manage the entire cooking process.
- Anticipate the needed adjustments due to fluctuating smoker temperatures.
As you see, there’s no singular path to smoking brisket success. It’s about meshing knowledge, finesse, and the unique qualities of your equipment and meat cut. The nuanced dance of temperature, time, and tactics leads to the grand finale—a brisket smoked to your personal pinnacle of perfection.
The Importance of Meat Preparation and Trimming
As a seasoned pitmaster, I cannot overstate the importance of Meat Preparation in smoking a brisket. The process begins even before the meat sees the smoker; it starts at the cutting board. The careful art of Trimming a Brisket is essential, not only to shape and define your meat cut, but also to ensure that smoke flavor can penetrate and enrich every bite.
The Role of Trimming in Smoking
Trimming presents us with an opportunity to control the cooking process from the very start. The aim isn’t simply to reveal the meat; it’s a meticulous approach I take to balance fat and flesh. Stripping away the excess fat down to about 1/4 inch has a twofold advantage. It evens out the cooking, preventing those unevenly cooked or overly greasy patches, and preserves just enough fat to imbue the brisket with moisture and flavor during long smoke sessions.
Removing the deckle and correctly shaping the brisket are steps that contribute to an even cook and efficient smoke absorption, paramount for creating that sought-after bark. Below is a look at the key elements you should focus on when trimming:
| Trimming Element | Reason | Outcome |
|---|---|---|
| Deckle/Fat mass by the point | Excess fat can impede smoke penetration | More even cook and better smoke flavor distribution |
| Exterior fat cap | Too much fat prevents seasoning adherence | Better spice adhesion and bark formation |
| Excess silver skin and loose meat | Non-uniform pieces cook unevenly | Consistent texture and enhanced visual appeal |
Seasoning Your Brisket for Peak Flavor
Seasoning a brisket encompasses much more than just taste enhancement; it’s a ritual that prepares the meat to fully embrace the smoke flavor. I’ve learned through trial and error that the seasoning process is as vital as the cooking method itself. For the initial foray into brisket smoking, I always suggest a classic approach: a rub of equal parts coarse Kosher sea salt and coarse ground black pepper.
This simple yet effective seasoning not only builds a robust flavor foundation but also compliments the natural savor of the beef. As your confidence grows, you’re free to enrich your rub with additional spices like granulated garlic, or even venture into creating your own blend, like the beloved Coffee Rub. Here’s my advice laid out:
- Keep it simple to start; salt and pepper are your best friends.
- Ensure even coverage for consistent flavor throughout the brisket.
- The rub should enhance, not overpower, the smoke and natural beef flavors.
And remember, a well-seasoned brisket promises a glorious matrimony with the smoke, infusing each slice with the stories of fire and time.
An evenly seasoned brisket will become a canvas, painted with complex flavors only achieved through the perfect marriage of seasoning and smoke.
Combining these aspects of preparation sets the stage for a smoking process that can yield the most exquisite results. Every pitmaster knows, a brisket lovingly trimmed and seasoned is a tribute to the craft itself—a cut above the rest.
Choosing the Right Wood for Smoked Brisket
As someone deeply immersed in the art of barbecue, I’ve come to appreciate that the best wood for smoking brisket plays a monumental role in crafting a tender, flavorsome brisket. While the preparatory seasoning and trimming are fundamental, the wood you choose is the soul of smoking a tender brisket. Join me in exploring the nuances of hardwood selection and the remarkable impact it has on your brisket.
Selecting the ideal wood is a balance of science and sensory pleasure. I stand by the venerable oak as a solid choice due to its consistent burn and robust flavor. Oak infuses the brisket with a remarkable depth of taste. However, as a pitmaster who thrives on nuance, I also cherish the subtle tones brought forth by cherry wood. Cherry not only complements the oak but blesses the brisket with a stunning mahogany hue.
I believe that when the right woods converge in the smoker, they create a symphony of smoke that elevates the brisket to new culinary heights.
It’s a dance of elements—balancing heat and smoke quality to ensure the brisket’s façade is as visually inviting as it is aromatic. Allowing the essence of the wood to permeate your brisket without overshadowing its innate flavors is an endeavor of tender precision.
But do not take my word for it; allow the evidence to speak through my experiences and the shared wisdom of generations of pitmasters:
| Wood Type | Flavor Profile | Heat Consistency | Coloration |
|---|---|---|---|
| Oak | Strong and earthy | Highly consistent | Rich bark |
| Cherry | Sweet and fruity | Moderately consistent | Mahogany tint |
| Hickory | Bold and savory | Consistent | Dark bark |
| Pecan | Nutty and sweet | Less consistent | Golden to dark hue |
My go-to combination, a fusion of oak and cherry hardwoods, forms a well-rounded profile that harmonizes with the brisket’s rich flavors. Pertinent to the selection process is using chunks over chips for their prolonged burning time, enhancing the brisket’s exposure to an aromatic caress of smoke that softens its fibers and envelops every bite in savory decadence.
Ultimately, the wood you choose is not just a fuel; it’s an ingredient—an ally in your quest for that sublime smoked brisket. It serves as the silent, humble companion to your brisket, celebrating its character while simultaneously offering its own to the gastronomic tapestry laid before expectant taste buds.
Remember, each wood bears its soul to the meat, guiding, not dictating—enhancing, not overwhelming. The journey I’ve embarked upon, exploring the best wood for smoking brisket, has consistently rewarded me with tender, sumptuous, and visually exquisite results. I encourage you to explore, experiment, and uncover the wood pairing that whispers to the very heart of your brisket.
And there you have it, my extended fellowship of barbecue aficionados. As you venture forth, may the smoke be your guide and the wood your muse in the captivating pursuit of the perfect smoked brisket.
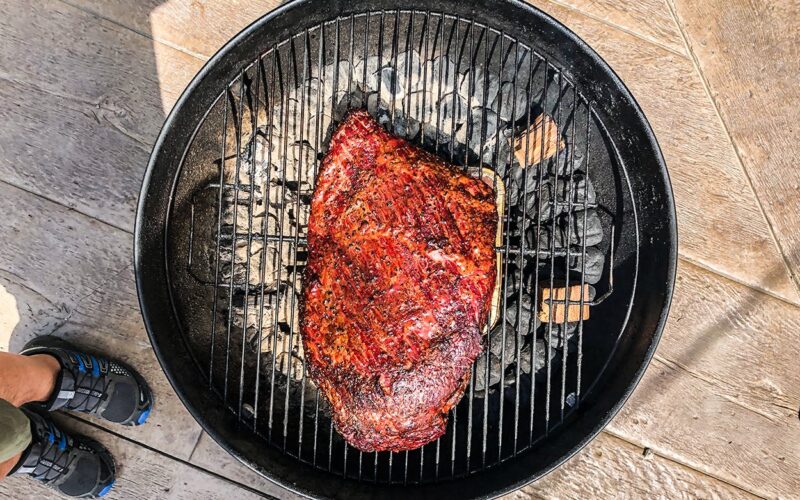
Getting the Smoker Ready: Temperature and Techniques
As I embark on my brisket smoking setup, I’m reminded that success hinges on meticulous preparation. The process of Getting the Smoker Ready is as crucial as the smoking itself, considering it’s the stage where the foundation for flavor and tenderness is laid down.
Setting Up Your Smoker for Success
Each smoker presents its unique characteristics and quirks, hence, familiarizing myself with the ins and outs of my own smoker is paramount to achieving a perfect smoke. The initial step involves strategically arranging the wood in the firebox to promote efficient airflow, followed by using paper, usually old newspapers or butcher paper, to light the fire. These initial moments set the tone for the hours of smoking that lie ahead.

For those of you following along at home, it’s important to understand that not all smokers are created equal. Your specific apparatus may require a little more finesse in fire management to maintain that sweet spot of smoke and heat. Here’s where an intimate knowledge of your tools is indispensable.
Temperature Control and Smoke Management
Speaking of sweet spots, let’s talk about Temperature Control. The low and slow mantra is not just barbecue lore; it’s a science that emphasizes keeping the smoking temperature around 225 degrees F. However, I also recognize that some may opt for temperatures up to 300 degrees F to expedite the smoking process.
Whether I’m a believer in the slow worship of the smoke gods or a little faster to the finish, maintaining a consistent temperature is a cardinal rule in the smoker’s handbook.
To delve deeper, here’s a table outlining the importance of various methods of Smoke Management that I employ to ensure a steady burn:
| Method | Benefit | Personal Tips |
|---|---|---|
| Wood arrangement | Optimizes airflow | Intertwine logs for better combustion |
| Quality of ignition | Facilitates a stable fire | Use natural fire starters for a cleaner burn |
| Choice of wood | Impacts smoke flavor | Oak and cherry for a robust profile |
| Water pan usage | Regulates humidity and temperature | 1 inch of water with a dash of oil for moisture and to catch drippings |
Constant vigilance ensures that the fire does not wane or surge too fiercely. Large logs become my allies early on—capable of burning longer, providing continuous smoke, and reducing the need for frequent interventions. Note that the lid of the smoker stays firmly closed, especially during the first few hours, as this is the golden window for smoke penetration.
With these insights into the preparation of the smoker, what follows is the commencement of a slow dance with fire and meat, orchestrating an interplay of heat and smoke that will eventually manifest as a beautifully smoked brisket. Trust in your setup, command your temperatures, and let the smoke work its magic. Your patience and prowess at this stage are what will set your brisket apart from the rest.
The Smoking Timeline: A Step-by-Step Breakdown
My approach to smoking brisket starts with a methodical draw of experience and precision. Each phase of the journey demands its own set of rules, the Initial Smoking Phase being no less crucial than any other. Let’s drill down into the specifics of these pivotal first hours.
Initial Smoking Phase: The First Few Hours
The dance with smoke and fire begins with the Initial Smoking Phase, a critical period where uninterrupted heat and smoke collaborate to lay down the foundation of flavor. Within these first three hours, the brisket is at the mercy of the smoker—unbothered, undisturbed. My sole mission: keep the smoker lid closed, lock in the temperature, and let the magic unfold. It’s in these early hours that I carve the destiny of the brisket, allowing the caress of smoke to seep deep into the heart of the meat, initiating the breakdown of tough connective tissues.
Mid-Smoke Considerations: To Spritz or Not to Spritz?
Once the brisket passes the threshold of the initial smoke phase, I am poised at a crossroads. I must ponder the Mid-Smoke Considerations, specifically, to Spritz a brisket or to let it thrive in its own juices. This decision isn’t lightweight—it’s the touchpoint between pastoral patience and the artistic stroke of moisture.
Should I opt to spritz, it involves a careful symphony conducted every 45 to 60 minutes with a mist that whispers over the bark, tenderly moistening it with a concoction of my choice—perhaps a mixture of water and beef stock, or a daring splash of beer. Yet, I must tread lightly, as overzealous spritzing may invite a protracted stall, prolonging the brisket smoke time unnecessarily.
For those embarking on their brisket journey, I offer this table—a clear-eyed view into the spritzing conundrum:
| Action | Results | Consideration |
|---|---|---|
| Omitting Spritz | Simpler process with less fuss | Less moisture may impact bark texture |
| Sporadic Spritz | Moistened bark, deeper flavor infusion | Maintain balance to avoid softening bark |
| Frequent Spritz | Highly moist environment, prolonged stall | May overextend the brisket smoke time |
In my arsenal of tools, a simple spray bottle stands at the ready—functioning as both ally and adversary in the quest for the quintessential bark. I take heed, assessing each brisket individually, allowing the alchemy of smoke and meat to guide my hand.
Thus unfolds the tapestry of the smoking timeline, a narrative woven with intentional heat, a vigil of temperature, and the charismatic spurt of a spritz bottle. For me, it’s a rite practiced with reverence, and every choice I make in this timeline is another brushstroke on the canvas of smoked brisket craftsmanship.
Overcoming the Brisket Stall: Patience is Key
Every pitmaster will face the test of the Brisket Stall at some point in their smoking adventures. Unlike other steps in the process, this one challenges not only your skills but also your fortitude. As the brisket approaches an internal temperature of around 145 degrees F, a curious phenomenon occurs—temperatures start to plateau, and for a while, you might think your thermometer is broken. But my friends, this is the brisket stall, and it is entirely normal, though unsettling as it may be.
During the stall, which can last until the brisket reaches around 175 degrees F, moisture evaporates from the brisket, essentially cooling it through evaporation, just like sweat on a hot day. This stage can persist from anywhere between 2-5 hours, sometimes breezing through and other times testing the limits of your patience in smoking brisket. The meat’s temperature won’t rise, and as the clock ticks, you might be tempted to intervene. But hold steady, because maintaining consistent temperatures in your smoker is critical here.
As a devoted enthusiast of the art of smoking brisket, my experience has taught me to respect this period of stasis. To come out on the other side with a tender, succulent beef masterpiece, patience is not just a virtue; it’s a requirement.
- Acknowledge the stall as a natural part of the smoking process.
- Resist the urge to increase the smoker’s temperature to rush through it.
- Use the time to monitor other aspects of smoking, like ensuring your wood supply is steady.
But how do we know a stall is taking place, and more importantly, how do we deal with it? The answer lies within a trusted thermometer and a steady gaze. To better understand this, I present to you a table, breaking down the typical signs and responses during a brisket’s stall period:
| Temperature Range | Signs of Stall | Recommended Action |
|---|---|---|
| 145 – 160 degrees F | Temperature Plateaus | Stay the course; maintain steady heat |
| 160 – 175 degrees F | Temperature Rises Slowly | Continue to monitor; adjust airflow if needed |
| Beyond 175 degrees F | Temperature Should Gradually Increase | Begin to prepare for the next stage in the smoking process |
It is during these testing hours that the savory, smoky flavor we all crave continues to seep into the beef. And so, we must find solace in knowing that what awaits is a brisket imbued with the commitment and care we’ve invested during these arduous moments.
Should the stall test your resolve, recall that this is an opportunity to hone your craft. Each brisket’s journey through the stall is a lesson in mastery and a promise of the rich, delectable feast to come. So stand firm, tend to your smoker with unwavering resolve, and anticipate the reward that patience in smoking brisket will bring: a beautifully smoked cut that defines BBQ excellence.
Wrapping Brisket: When and Why It’s Done

When you reach the juncture in your brisket’s smoke journey with an internal temperature hovering around 165 degrees F and a handsomely formed bark, you’re faced with an important decision—to wrap or not to wrap. This milestone moment in the cooking process brings us to the practice commonly referred to as “The Texas Crutch.” It’s a crucial technique intended to retain moisture and expedite the brisket’s cook time in its final hours. Let’s delve into the two customary materials used for this procedure: aluminum foil and pink butcher paper.
The Texas Crutch: Foil vs. Butcher Paper
Both aluminum foil and butcher paper are excellent choices for wrapping brisket, each offering distinct advantages. Knowledgeable pitmasters select their wrapping medium based on the desired outcome for their brisket’s texture, moisture, and flavor profile.
Choosing between foil and butcher paper is akin to selecting the right attire for your brisket, ensuring it’s perfectly dressed for the remainder of its smoky rendezvous.
I’ve wrapped briskets using both methods, and here’s what I’ve found:
| Wrapping Material | Moisture Retention | Bark Texture | Smoke Penetration |
|---|---|---|---|
| Aluminum Foil | High | Soft | Minimal |
| Butcher Paper | Moderate | Formed | Enhanced |
When discussing Wrapping Brisket, aluminum foil, by virtue of being impermeable, traps all the moisture, essentially steaming the brisket in its own juices and speeding up the cook time. This results in an incredibly tender, but potentially soggy exterior rather than the prized crusty bark many aficionados covet.
In contrast, pink butcher paper, a darling in the barbecue world, is breathable and thus straddles the line between locking in moisture and allowing the brisket to bathe still slightly in the smoke. It supports the bark’s integrity while fostering a juicy, flavorful interior—a harmony of succulence and texture.
To further illuminate the utility of the “Texas Crutch,” let’s explore its key benefits:
- Stalling Defender: Wrapping can help push through the dreaded brisket stall, that mysterious plateau of temperature during cooking.
- Moisture Manager: It locks in those coveted juices, nearly guaranteeing a moist experience.
- Bark Builder: Depending on the wrap, it can help enhance the sought-after bark on the brisket’s surface.
Between Foil vs. Butcher Paper, my personal leaning has become apparent over countless smoke sessions—pink butcher paper is my go-to. Notably, this isn’t just a baseless preference; it’s an informed choice. Butcher paper seems to be the best of both worlds, offering a tender yet textured brisket that’s not overly steamed but instead enriched with the subtle notes of oak and cherry smoke from hours spent enveloped within my smoker.
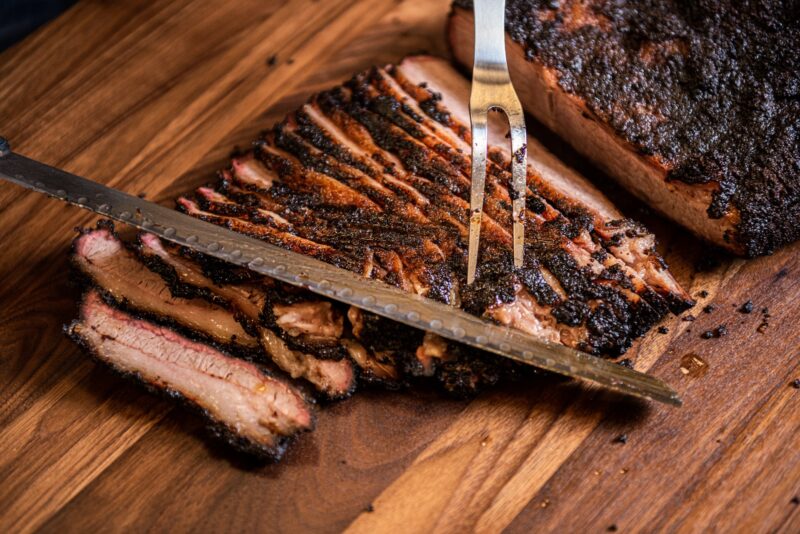
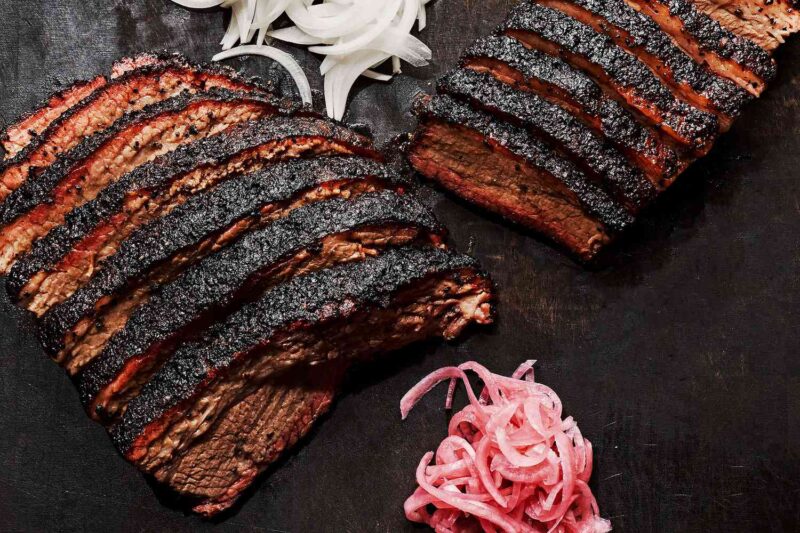
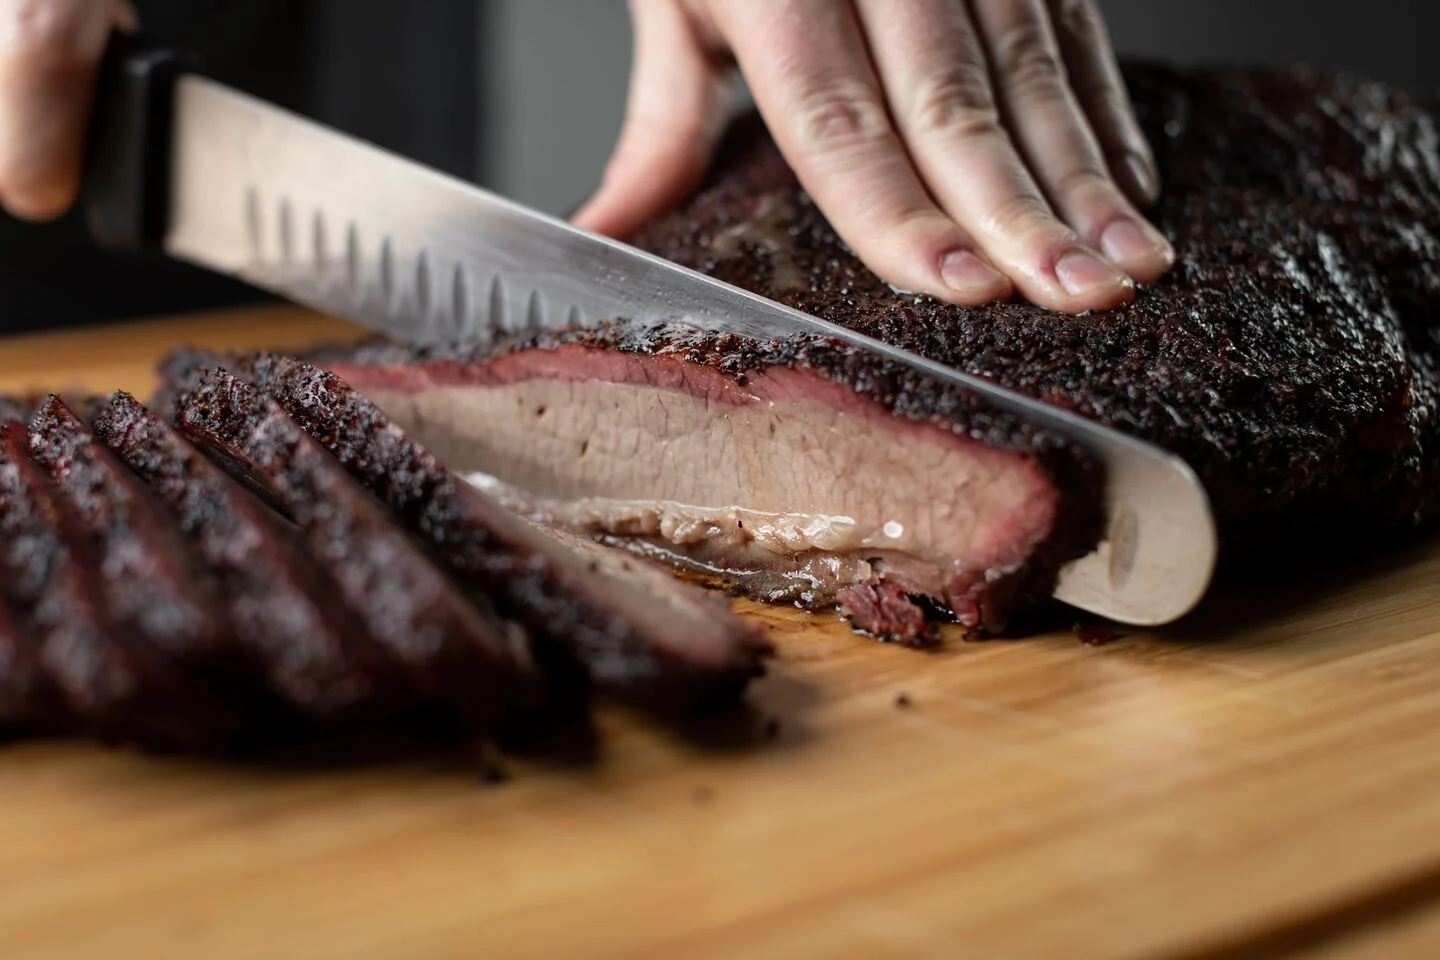
Testing for Doneness: It’s More Than Temperature

While my brisket slowly transforms under the billows of smoke, a moment of truth approaches that demands my full attention: Testing for Doneness. Many novices in the world of barbecue rely solely on internal temperature as a signpost for a brisket’s readiness. However, through years of meticulous practice, I have learned that true doneness is determined by more than just the numbers on a thermometer. The softness, the feel, and the response of the brisket to a probe say much about the hours of cooking that have taken place.
A soft, butter-like resistance is what I seek when probing the brisket. This assures me that the connective tissues have surrendered to the heat, weaving tenderness into every fiber of the meat.
The smoked brisket cooking duration culminates to this stage, yet intuition and experience play just as crucial a role as the timer. I’ve seen briskets reach the ideal internal temperature of around 200 degrees F, yet still require additional time to achieve the perfection in texture I desire. Variations in size, composition, and even the idiosyncrasies of each individual smoker all affect the final product.
| Texture Test | Description | Indication |
|---|---|---|
| Probe Tender | Gently inserting a probe or skewer | Brisket is ready when there is little resistance |
| Bounce Back | Pressing the surface gently | Surface springs back quickly when the brisket still needs more time |
| Jiggle | A slight shake of the brisket | Indicates well-rendered fat and doneness when the brisket exhibits a subtle jiggle |
My litmus test for doneness moves beyond the simple “Is it 200 degrees yet?” to “How does it feel?” Each brisket tells its own story, and it’s my responsibility as the pitmaster to listen, interpret, and act accordingly. Armed with my trusty probe and a vigilant eye on the tenderness, I can confidently declare the brisket’s journey within the smoker complete when all signs align in delicious harmony.
- Secure a precise meat thermometer; reliability is key in these final hours.
- Consider the brisket’s response to probing; the tenderness reveals much about the internal transformation.
- Observe the brisket’s surface and structure; doneness encompasses both the inward and outward state of the meat.
In summary, Testing for Doneness is an intricate dance between empirical measurement and sensory evaluation. It is this blend of science and art that separates an average brisket from one that leaves a lasting impact on the palates of those lucky enough to savor it.
The Resting Phase: Why It’s Critical for a Perfect Brisket
Within the sacred temple of barbecue, there lies a frequently undervalued yet utterly indispensable ritual: the Resting Phase. After the arduous dance with smoke and fire, the resting phase is akin to a silent serenade that plays out deep within the fibers of smoked meats. As a devout pitmaster, I heed the calling of this essential pause, knowing that it affords the brisket a sublime metamorphosis into a velvety, tender finale.
The true test of a barbecuer’s mettle isn’t just how well one can manage the flames or the smoke; it’s also about mastering the art of patience during the Resting Smoked Meats phase. It is here that the brisket’s soul is truly revealed.
The process is elementary yet pivotal; the brisket must recline in repose, slowly eclipsing from its peak internal heat of around 200 degrees F to a more modest 145 degrees F. It is within this gentle unwinding that the meat reclaims its exuded juices, distributing them back throughout its structure, ensuring each bite is maximally succulent.
Proper Techniques for Resting Smoked Meats
Encasing the brisket in a protective wrapping of towels and nestling it inside a cooler is not merely a technique, but an act of preservation. This method safeguards the temperature, gingerly lowering it while steadfastly prolonging the state of rest.
The tools and methods are straightforward, yet the impact profound. To further elucidate, here is a comprehensive table laying out the intricate dynamics at play during this critical resting phase:
| Resting Method | Temperature Maintenance | Juice Reabsorption |
|---|---|---|
| Wrapped in Towels | Retained heat for a protracted period | Maximized due to retained temperature |
| Placed in Cooler | Gently lowered temperature over time | Enhanced, as fibers reabsorb over hours |
| Resting Duration | Directly proportional to size of brisket | Essential for full juice distribution |
As I often counsel, eschew the temptation to truncate this rest. Yielding to impatience, carving into the brisket too soon, is to forsake the opportunity for the meat to attain its true potential. The fibers of the brisket, taut from the onset of heat, must be allotted the grace period to relax, to breathe, to welcome back the essence that is the juice of life within its corpus.
- Respect the resting phase as sacred; it is the custodian of moisture and tenderness.
- Employ towels and a cooler to maintain temperature, but also to engender a calibrated cooling.
- Patience, above all, remains supreme—allow the brisket to be still as it whispers of readiness.
In conclusion, the Resting Phase is the denouement in the symphony of smoking a brisket. It’s where all that has transpired in the smoker comes to fulfill its destiny. By granting the meat this essential contemplative pause, we pay homage to the tradition, the craft, and the very essence of barbecue itself.
Conclusion: The Pilgrimage to Brisket Perfection
In this guide to perfect brisket, we’ve traversed the terrain of barbecue tips with a meticulous eye. From the initial preparation of trimming and seasoning to the nuances of wood selection and temperature control, each step is crucial to the final, sumptuous result. Mastering the brisket’s smoking timeline, acknowledging the inevitability of the stall, and wrapping with reverence further highlights the confluence of art and science in barbecue. The resting phase, a testament to the virtue of patience, places the crowning touch on a journey well executed.
My narrative has hopefully embellished your understanding and inspired your culinary aspirations. Remember, the path to a perfect brisket is unique with each endeavor; no two pieces of meat or smoking sessions are ever identical. It’s a process full of personal discovery and gradual mastery, enriched by each hour spent tending to the dance of smoke and embers. Dedication, attuned senses, and a passion for the craft all contribute to the revelation of a brisket’s deep, soulful flavors and tender textures.
As your barbecue sojourn continues, may these barbecue tips serve as your compass, guiding you to the savory zenith of brisket excellence. Therein lies the reward for the pitmaster’s faithful labor—a brisket that whispers tales of smoke, echoes the murmur of steady flames, and celebrates the culmination of technique honed by the passage of time. Embrace this guide to perfect brisket, and relish in the rapturous journey that beckons every time the smoker beckons.
FAQ
How Long To Smoke a Brisket?
The length of time to smoke a brisket can vary greatly, typically ranging from 13-17 hours for a 12-14 pound brisket at 225°F to 250°F. It can be roughly one to two hours per pound, but this is influenced by numerous factors such as smoker efficiency, temperature, and the particular cut of meat.
What Factors Affect Smoking Time for a Brisket?
Factors affecting smoking time include the type and size of brisket, the constant smoker temperature maintained, the outside weather conditions, the smoker type, and whether you choose to wrap the brisket during cooking. Individual brisket characteristics like fat content and thickness also play a role.
How Important Is Meat Preparation in Smoking Brisket?
Meat preparation is crucial for a successful smoke. Trimming a brisket to leave approximately 1/4 inch of fat and seasoning it properly ensures that the meat cooks evenly, absorbs the smoke flavor effectively, and develops a flavorful bark. Preparation sets the stage for the cooking process.
Which Wood Is the Best for Smoking Brisket?
Oak is a popular choice due to its excellent flavor and consistent heat. Cherry wood is also favored for its subtle, sweet flavor and the beautiful color it lends to the brisket. The wood chosen will impact the smoke intensity and the final taste of the brisket.
How Do I Set Up My Smoker for Smoking Brisket?
Start by arranging the wood or coal for good airflow, ignite the smoker using paper or starter cubes, and preheat it to the desired temperature, typically around 225°F for low and slow cooking. Ensure steady temperature control throughout the process for consistent results.
What Is the Initial Smoking Phase and Why Is It Important?
The initial smoking phase is the first three hours of the cooking process where the brisket absorbs most of the smoke flavor and begins to develop the bark. It’s essential because it sets the foundation for the brisket’s flavor and tenderness.
Should I Spritz My Brisket During Smoking?
Whether to spritz your brisket with a liquid like apple cider vinegar or broth is up to personal preference. Spritzing can help develop a flavorful bark and a moist surface, but it can also prolong the brisket stall if overdone. Some pitmasters prefer not to spritz to maintain consistent cooking conditions.
What Is the Brisket Stall and How Do I Manage It?
The brisket stall is a period during smoking when the meat’s internal temperature plateaus, often around 145°F to 175°F, due to evaporative cooling. It can last several hours. To manage it, maintain consistent smoker temperatures or wrap the meat to help push through the stall more quickly.
Foil vs. Butcher Paper: Which Is Better for Wrapping Brisket?
It depends on your end goal. Foil locks in more moisture and speeds up the cooking process but may soften the bark. Butcher paper is breathable, allows for further smoke penetration, and helps to preserve the bark’s integrity while still retaining moisture.
How Do I Know When My Brisket Is Done?
Doneness is based on texture and internal temperature. A brisket is generally done when it reaches an internal temperature of around 200°F and has a soft, butter-like feel when probed. Resting it properly after smoking is crucial for the juices to redistribute and for the fibers to relax.
Why Is Resting Smoked Brisket So Important?
Resting allows the juices that have been forced to the brisket’s edges during cooking to redistribute throughout the meat. This results in a moister, more tender brisket. Resting can take place over a period of 1 to 2 hours post-smoking before slicing is recommended.