Welcome to the world of mouthwatering tri-tip on a Traeger grill! If you’re looking to elevate your grilling game and impress your taste buds, I’ve got the secret recipe for making the best tri-tip right here.
Factual data: The secret to making the best tri-tip on a Traeger grill is to season the tri-tip with a dry rub, let it come to room temperature before cooking, and use a two-step cooking method. Start by searing the tri-tip on high heat for a nice crust, then lower the heat and cook with the lid closed to evenly finish the inside.
This method ensures that the tri-tip is tender, flavorful, and moist all the way through. It’s important to choose a well-marbled tri-tip roast and season it generously with a dry rub of salt, pepper, garlic powder, onion powder, and other spices.
Preheat the Traeger grill to 425°F, place the tri-tip in a cast-iron skillet on the hottest area of the grill, and cook for 5 minutes on each side. Then, move the tri-tip to the cooler side of the grill, lower the temperature to 325°F, and cook for an additional 20-25 minutes, or until the internal temperature reaches 130°F. Let the tri-tip rest for 10-15 minutes before slicing against the grain and serving.
Key Takeaways:
- Season the tri-tip with a dry rub and let it come to room temperature before cooking.
- Use a two-step cooking method: sear on high heat, then cook with the lid closed to finish the inside.
- Choose a well-marbled tri-tip roast for maximum flavor and tenderness.
- Preheat the Traeger grill to 425°F and cook the tri-tip for 5 minutes on each side.
- Move the tri-tip to the cooler side of the grill, lower the temperature to 325°F, and cook for an additional 20-25 minutes, or until the internal temperature reaches 130°F.
- Let the tri-tip rest for 10-15 minutes before slicing against the grain and serving.
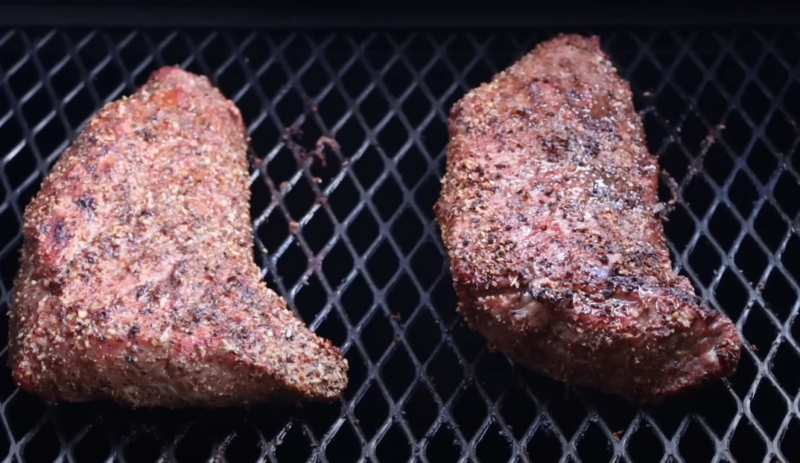
Choosing the Perfect Tri-Tip Cut for Grilling
When it comes to making the best tri-tip on a Traeger grill, selecting the perfect cut of beef tri-tip is crucial. Whether you prefer a steak-like texture or a juicy roast, understanding the different options available will help you achieve the desired outcome.
One popular choice is the beef tri-tip steak, known for its tenderness and rich flavor. This cut is perfect for those who enjoy a steak-like texture with a slightly pink center. It cooks quickly and is best-served medium-rare to medium.
For those looking for a juicier and more tender result, the tri-tip roast is an excellent option. This cut is larger and thicker than the steak, allowing for a longer cooking time that results in a succulent and flavorful roast. It is ideal for those who prefer their meat well-done.
Whichever cut you choose, ensure that it has a good amount of marbling, as this will enhance the flavor and juiciness of the tri-tip. Take the time to carefully select the perfect cut, and you’ll be well on your way to creating the best tri-tip on your Traeger grill.
| Cut | Texture | Cooking Time |
|---|---|---|
| Beef Tri Tip Steak | Steak-like | Quick |
| Tri Tip Roast | Juicy and tender | Longer |
The Benefits of Marinating Tri Tip
Elevate the flavor profile of your tri-tip by marinating it before grilling. Discover the secret to tender and succulent meat that will have your taste buds dancing with joy. Marinating tri-tip not only adds incredible flavor but also helps to tenderize the meat, resulting in a melt-in-your-mouth texture.
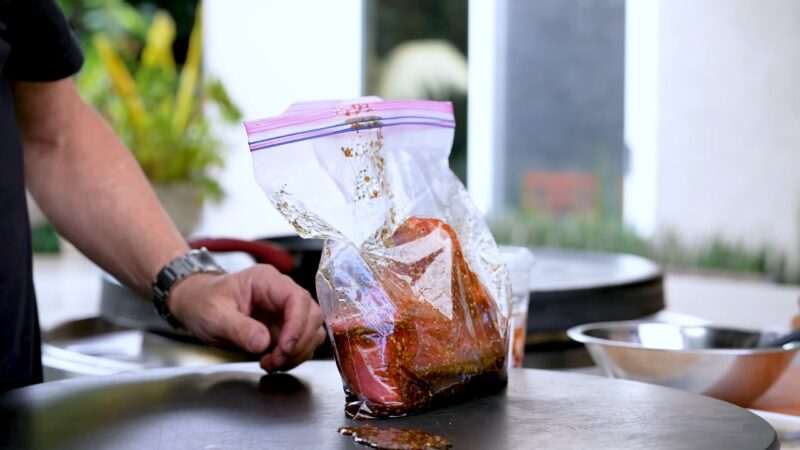
When marinating tri-tip, you have the freedom to choose from a wide variety of flavors and ingredients that complement the rich, beefy taste of the meat. Whether you prefer a classic combination of garlic, rosemary, and balsamic vinegar or a bold and spicy marinade with chili peppers and soy sauce, there’s a marinade out there to suit every palate.
Marinating tri-tip is a simple process that requires just a few steps. Start by combining your desired marinade ingredients in a bowl or resealable bag. Place the tri-tip in the marinade, ensuring it is fully coated, and refrigerate for at least 2 hours or overnight for maximum flavor infusion. Remember to flip the tri-tip halfway through to ensure even marinating.
Once your tri-tip has marinated to perfection, it’s time to fire up the Traeger grill and cook it to succulent perfection. The combination of a well-marinated tri-tip and the smoky, charred flavor from the Traeger grill will create a culinary masterpiece that will impress family and friends alike.
| Benefits of Marinating Tri Tip: |
|---|
| Enhanced flavor profile |
| Tender and succulent texture |
| Endless flavor possibilities |
| Simple marinating process |
| Impressive results on the Traeger grill |
Creating the Perfect Dry Rub for Tri Tip
A well-crafted dry rub is the key to infusing your tri-tip with a burst of delicious flavors. Learn how to create a tantalizing blend of spices that will enhance the natural richness of the meat.
To start, gather your ingredients for the dry rub. You’ll need a combination of salt, pepper, garlic powder, onion powder, and any other spices or herbs of your choice. Use a small bowl to mix the ingredients together, ensuring that they are well combined.
When applying the dry rub to your tri-tip, be generous and make sure to cover the entire surface of the meat. Using your hands, massage the rub into the tri-tip, allowing it to penetrate the meat and infuse it with flavor. Don’t be afraid to get your hands dirty!
Once the tri-tip is seasoned, let it sit at room temperature for about 30 minutes. This will allow the flavors to meld together and the meat to absorb the spices. It’s an essential step that ensures the best results when cooking on a Traeger grill.
Now that your tri-tip is properly seasoned, it’s ready to be cooked on your Traeger grill. The dry rub will create a flavorful crust on the outside of the tri-tip while keeping the inside juicy and tender. Get ready to impress your friends and family with your skills in creating the best tri-tip on a Traeger grill!
| Ingredients | Amount |
|---|---|
| Salt | 2 tablespoons |
| Pepper | 1 tablespoon |
| Garlic powder | 1 tablespoon |
| Onion powder | 1 tablespoon |
| Other spices or herbs | As desired |
Preparing Tri Tip for Grilling
Before you fire up your Traeger grill, it’s important to prepare your tri-tip properly for the best results. Follow these simple steps to ensure a mouthwatering and tender tri-tip every time.
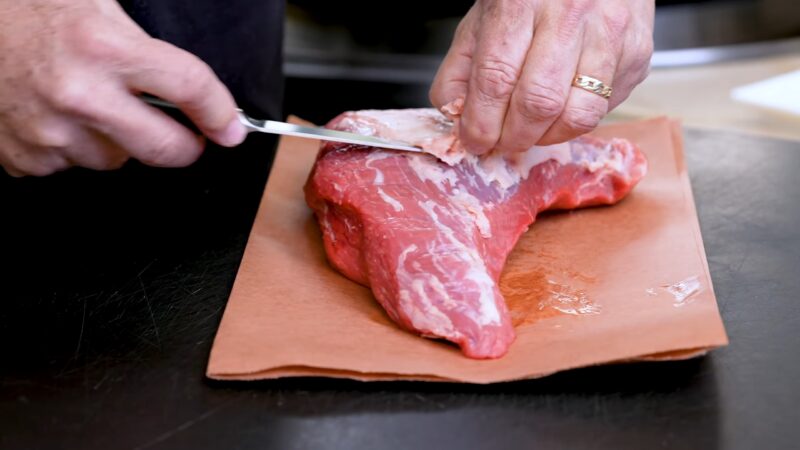
Step 1: Choosing the Perfect Tri Tip Cut
The first step in preparing tri-tip for grilling is to choose the right cut of meat. Look for a well-marbled tri-tip roast, as this will ensure that your final dish is juicy and full of flavor. You can find tri-tip cuts labeled as either beef tri tip, tri-tip steak, or tri-tip roast at your local butcher or grocery store.
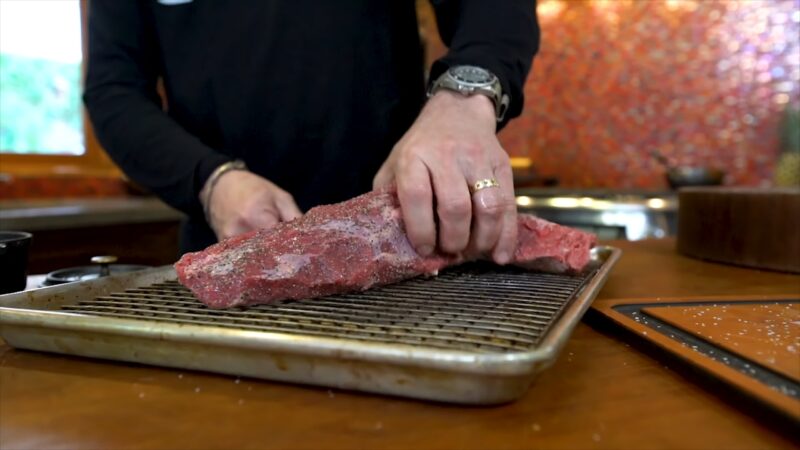
Step 2: Seasoning with a Dry Rub
Next, it’s time to season your tri-tip with a flavorful dry rub. Combine salt, pepper, garlic powder, onion powder, and any other spices you prefer in a small bowl. Generously rub the mixture onto all sides of the tri-tip, ensuring that it is evenly coated. This will not only enhance the taste of the meat but also create a delicious crust when grilled.
Step 3: Getting the Grill Ready
Now that your tri-tip is seasoned, it’s time to preheat your Traeger grill to 425°F. Place the tri-tip in a cast-iron skillet on the hottest area of the grill and let it sear for about 5 minutes on each side. This will create a beautiful caramelized crust.
Once the tri-tip is seared, move it to the cooler side of the grill and lower the temperature to 325°F. Close the lid to create an oven-like environment, allowing the tri-tip to cook gently and evenly. Cook for an additional 20-25 minutes, or until the internal temperature reaches 130°F for medium-rare or your desired level of doneness.
Finally, remove the tri-tip from the grill and let it rest for 10-15 minutes before slicing against the grain. This will ensure a tender and succulent tri-tip with maximum juiciness.
| Step | Instructions |
|---|---|
| 1 | Choose a well-marbled tri-tip cut |
| 2 | Season with a flavorful dry rub |
| 3 | Preheat Traeger grill to 425°F and sear the tri-tip for 5 minutes on each side |
| 4 | Move tri-tip to cooler side of the grill, lower temperature to 325°F, and cook for 20-25 minutes |
| 5 | Let tri-tip rest for 10-15 minutes before slicing against the grain |
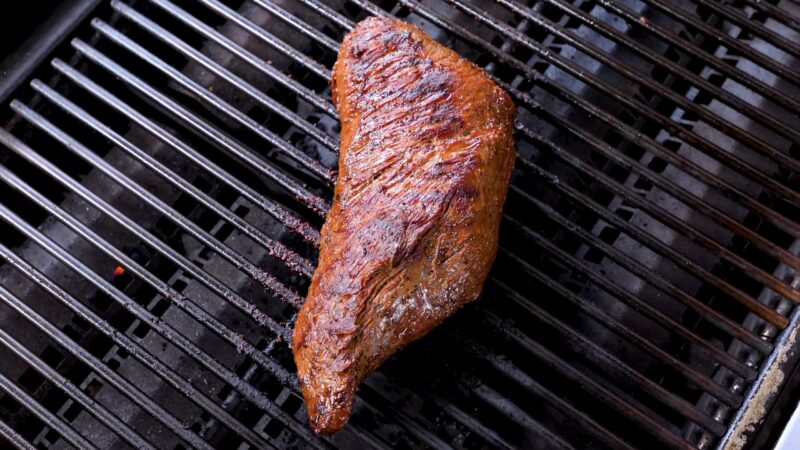
Searing Tri Tip for a Flavorful Crust
Get ready to unleash a burst of savory flavors by searing your tri-tip to create a tantalizing crust on the outside. Master the art of high-heat grilling to achieve that perfect sear. The secret lies in the initial searing process, which locks in the juices and adds a beautiful caramelized layer to the tri-tip.
To begin, preheat your Traeger grill to 425°F. While the grill is heating up, generously season your well-marbled tri-tip roast with a dry rub of your choice. A classic combination of salt, pepper, garlic powder, onion powder, and other spices works wonders for enhancing the natural flavors of the meat.
Once the grill has reached the desired temperature, place the tri-tip in a cast-iron skillet and position it on the hottest area of the grill. Sear for approximately 5 minutes on each side, until a lovely golden-brown crust forms. This initial searing will give your tri-tip a mouthwatering appearance and a delightful texture.
Next, it’s time to move the tri-tip to the cooler side of the grill. Lower the temperature to 325°F and close the lid to create an oven-like environment. This allows the tri-tip to cook evenly and retain its moisture throughout the rest of the grilling process. Cook for an additional 20-25 minutes, or until the internal temperature reaches 130°F for a medium-rare tri-tip.
| Traeger Grill Temperature | Searing Time | Cooking Time | Internal Temperature |
|---|---|---|---|
| 425°F | 5 minutes per side | 20-25 minutes | 130°F (medium-rare) |
Once the tri-tip has reached the desired internal temperature, remove it from the grill and let it rest for 10-15 minutes. This resting period allows the juices to redistribute, resulting in a moist and tender tri-tip. Finally, slice the tri-tip against the grain to maximize its tenderness and serve it up to enjoy a mouthwatering meal that will impress your family and friends.
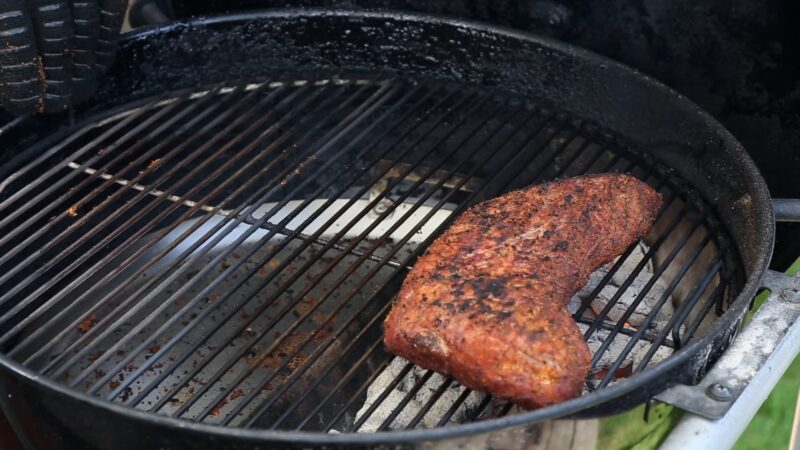
Two-Step Cooking Method for Tender and Moist Tri Tip
Take your tri-tip to the next level with a two-step cooking method that guarantees a mouthwatering texture and unmatched flavor. Learn the secrets to achieving a perfectly smoked and juicy tri-tip every time.
Start by preheating your Traeger grill to 425°F to ensure a hot cooking surface. While the grill is heating up, season your well-marbled tri-tip roast with a dry rub of salt, pepper, garlic powder, onion powder, and any other desired spices. Be generous with the seasoning, as this will enhance the flavor of the meat.
Once the grill has reached the desired temperature, place the seasoned tri-tip in a cast-iron skillet on the hottest area of the grill. Sear the tri-tip for about 5 minutes on each side, creating a nice crust. This initial searing locks in the juices and adds a rich flavor to the meat.
After searing both sides, move the tri-tip to the cooler side of the grill and lower the temperature to 325°F. Close the lid of the grill to create a convection effect, allowing the tri-tip to cook evenly on the inside. Cook the tri-tip for an additional 20-25 minutes, or until the internal temperature reaches 130°F for medium-rare or 135°F for medium. Cooking times may vary depending on the size and thickness of the tri-tip.
Pro tip:
For an extra layer of flavor, consider adding wood chips or chunks to your Traeger grill. This will infuse the tri-tip with a subtle smoky taste that complements the meat perfectly. Experiment with different wood varieties, such as hickory or mesquite, to find your preferred flavor profile.
| Internal Temperature | Level of Doneness |
|---|---|
| 130°F | Medium-rare |
| 135°F | Medium |
Achieving the Perfect Internal Temperature
Cooking tri-tip to the perfect internal temperature is essential for achieving a tender and juicy result. To ensure your tri-tip is cooked to perfection, follow these ideal cooking times and guidelines:
1. Preheat your Traeger grill to 425°F.
2. Season your well-marbled tri-tip roast generously with a dry rub of salt, pepper, garlic powder, onion powder, and other spices.
3. Place the tri-tip in a cast-iron skillet on the hottest area of the grill and sear for 5 minutes on each side to create a nice crust.
4. Move the tri-tip to the cooler side of the grill and lower the temperature to 325°F.
5. Cook the tri-tip for an additional 20-25 minutes, or until the internal temperature reaches 130°F for medium-rare. Adjust the cooking time according to your desired doneness.
6. Remove the tri-tip from the grill and let it rest for 10-15 minutes. This allows the juices to be redistributed and ensures a tender and flavorful result.
7. Slice the tri-tip against the grain to maximize tenderness and serve.
Remember, these guidelines are just a starting point. Factors such as the thickness of the tri-tip and the accuracy of your grill’s temperature can vary, so it’s always best to use an instant-read thermometer to check the internal temperature for perfect doneness.
| Tri Tip Doneness | Internal Temperature |
|---|---|
| Medium-Rare | 130°F |
| Medium | 135°F |
| Medium-Well | 145°F |
By following these guidelines and adjusting your cooking time and temperature based on your specific preferences, you can achieve a perfectly cooked tri-tip that is tender, juicy, and full of flavor.
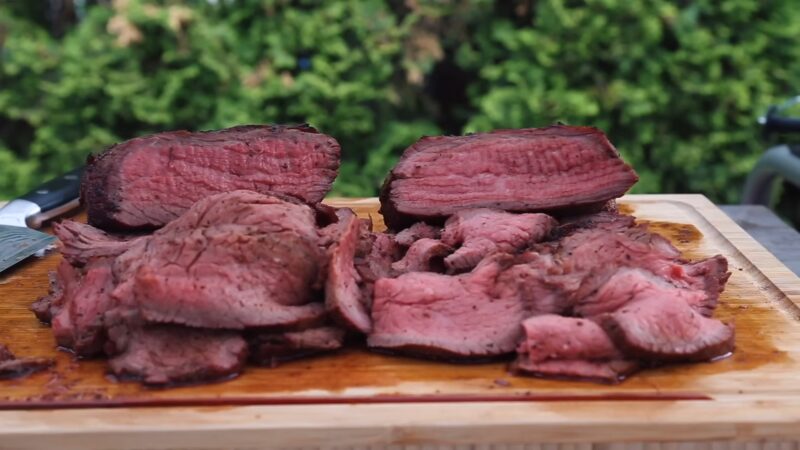
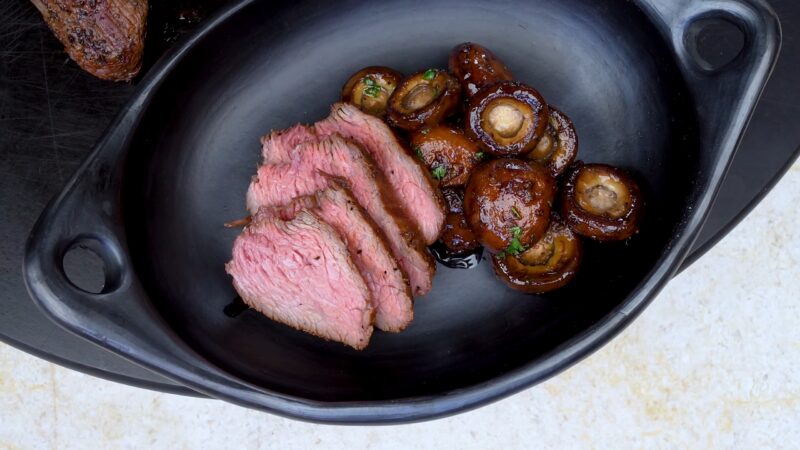
Resting and Slicing Tri Tip
Patience is key when it comes to resting and slicing your tri-tip. Discover the art of letting the flavors settle and carve the meat against the grain for a melt-in-your-mouth experience.
After cooking your tri-tip to perfection, it’s crucial to let it rest for 10-15 minutes. This allows the juices to redistribute, resulting in a tender and flavorful piece of meat. During the resting period, cover the tri-tip loosely with foil to keep it warm.
When it’s time to slice, remember to cut against the grain. This means cutting perpendicular to the muscle fibers, which helps to break them up and create a more tender bite. The grain of the tri-tip is typically diagonal, so pay attention to the direction of the muscle fibers and adjust your slicing accordingly.
For an impressive presentation, slice the tri-tip into thin, even slices. Pro tip: if you’re serving a larger group, slice the tri-tip into individual portions and arrange them on a platter. This makes it easy for guests to grab a slice and enjoy the succulent flavors of the tri-tip.
| Serving Size | Resting Time | Slicing Technique |
|---|---|---|
| Individual Portions | 10-15 minutes | Against the grain |
| Large Platter | 10-15 minutes | Against the grain |
By mastering the art of resting and slicing, you’ll elevate your tri-tip game to new heights. The tender, juicy, and flavorful results will impress your guests and leave them asking for your secret recipe. Remember, the key is to have patience and let the flavors shine in every slice of tri-tip you serve.
Tips and Tricks for Tri Tip Success
Ready to become a tri-tip grilling pro? Dig deeper into the world of culinary excellence with these expert tips and tricks that will elevate your tri-tip game to new heights.
1. Choose the Perfect Tri Tip
When selecting your tri-tip, opt for a well-marbled roast for maximum flavor and tenderness. Look for a cut with a good amount of marbling throughout the meat. This marbling will render down during cooking, infusing the tri-tip with incredible juiciness and flavor.
2. Season Generously with a Dry Rub
A perfectly seasoned tri-tip is key to achieving a mouthwatering result. Create a dry rub by combining salt, pepper, garlic powder, onion powder, and any other spices you desire. Generously coat the tri-tip with the dry rub, pressing it into the meat to ensure it adheres. Let the tri-tip sit at room temperature for about 30 minutes to allow the flavors to penetrate the meat.
3. Master the Two-Step Cooking Method
To achieve a tender and moist tri-tip, employ the two-step cooking method. Begin by searing the tri-tip on high heat for about 5 minutes on each side. This will create a flavorful crust on the outside. Then, lower the heat to 325°F and continue cooking with the lid closed until the internal temperature reaches 130°F. The combination of searing and slow cooking ensures a perfectly cooked tri-tip with a juicy, evenly cooked interior.
| Cooking Temperatures | Internal Temperature |
|---|---|
| Sear | High Heat (425°F) |
| Finish | Low Heat (325°F) |
4. Let it Rest and Slice Against the Grain
After cooking, let the tri-tip rest for 10-15 minutes to allow the juices to redistribute and the meat to relax. Then, slice the tri-tip against the grain to maximize tenderness. Cutting against the grain ensures that each bite is tender and easy to chew.
By following these tips and tricks, you’ll be able to create a delicious, perfectly cooked tri-tip on your Traeger grill. Enjoy the mouthwatering results and impress your friends and family with your newfound tri-tip grilling prowess!
Troubleshooting Common Tri Tip Grilling Issues
Grilling tri-tip can sometimes come with its fair share of challenges. Don’t let these obstacles discourage you – arm yourself with the knowledge to troubleshoot and overcome any issues that may arise.
Issue 1: Uneven Cooking
Solution: One common problem when grilling tri-tip is achieving even cooking throughout the meat. To prevent this, make sure to sear the tri-tip on high heat to create a flavorful crust. Then, move the tri-tip to a cooler side of the grill and lower the heat for the remaining cooking time. This two-step method will help cook the tri-tip evenly and prevent overcooking or undercooking certain sections. Consider using a meat thermometer to ensure the tri-tip reaches the desired internal temperature.
Issue 2: Dry Tri Tip
Solution: Dry tri-tip can be a disappointing outcome. To keep your tri-tip moist and juicy, make sure to marinate it before grilling. The marinade will help infuse flavor and add moisture to the meat. Additionally, be mindful of the cooking time and temperature. Overcooking can result in dryness, so aim for a medium-rare to medium level of doneness. Also, allow the tri-tip to rest for a few minutes after grilling before slicing. This allows the juices to redistribute throughout the meat, resulting in a more succulent bite.
Issue 3: Overcooking or Undercooking
Solution: Achieving the perfect level of doneness can be a challenge. To avoid overcooking or undercooking your tri-tip, use a meat thermometer to monitor the internal temperature. The ideal range for tri-tip is 130°F-135°F (54°C-57°C) for medium-rare.
Remember, the tri-tip will continue to cook slightly as it rests, so it’s best to remove it from the grill a few degrees below the desired temperature. If you find that your tri-tip is undercooked, you can always return it to the grill for a few more minutes. However, be cautious not to overcook it, as this can result in dryness.
Issue 4: Tough Tri Tip
Solution: Tough tri-tip can be a result of not slicing the meat properly. To ensure tenderness, it’s important to slice the tri-tip against the grain. This means cutting perpendicular to the direction of the muscle fibers. Slicing against the grain breaks up the muscle fibers, resulting in a more tender texture. Additionally, be sure to let the cooked tri-tip rest for 10-15 minutes before slicing. This allows the juices to settle and the meat to become more tender.
| Issue | Solution |
|---|---|
| Uneven Cooking | Sear tri-tip on high heat, then move to a cooler side of the grill for remaining cooking time |
| Dry Tri Tip | Marinate tri-tip before grilling and allow it to rest after cooking |
| Overcooking or Undercooking | Use a meat thermometer to monitor the internal temperature and aim for medium-rare to medium doneness |
| Tough Tri Tip | Slice the tri-tip against the grain and let it rest before slicing |
FAQ
What is the secret to making the best tri-tip on a Traeger grill?
The secret is to season the tri-tip with a dry rub, let it come to room temperature before cooking, and use a two-step cooking method.
How do I choose the perfect tri-tip cut for grilling?
It’s important to choose a well-marbled tri-tip roast for grilling.
What are the benefits of marinating tri-tip?
Marinating tri-tip before grilling enhances the flavor, tenderness, and juiciness of the meat.
How do I create the perfect dry rub for tri-tip?
Create a dry rub using salt, pepper, garlic powder, onion powder, and other spices to complement the meat and add a flavorful crust.
How do I prepare a tri-tip for grilling?
Apply the dry rub to the tri-tip and let it come to room temperature before grilling.
How do I sear tri-tip for a flavorful crust?
Start by searing the tri-tip on high heat to achieve a flavorful crust.
What is the two-step cooking method for tender and moist tri-tip?
Sear the tri-tip on high heat to create a crust, then lower the heat and cook with the lid closed to finish the inside.
How do I achieve the perfect internal temperature when cooking tri-tip?
Cook the tri-tip until the internal temperature reaches 130°F for medium-rare.
Final Words
In conclusion, mastering the art of cooking tri-tip on a Traeger grill involves understanding marinating techniques and precise cooking methods. Start by seasoning your tri-tip with a flavorful dry rub and let it sit to ensure even cooking.
The two-step grilling method—searing followed by slower cooking—guarantees a tender and juicy result. Remember to let the tri-tip rest before slicing to preserve its tenderness.
With these techniques, you’re set to delight guests with your culinary prowess, making every BBQ session memorable.
Source Links